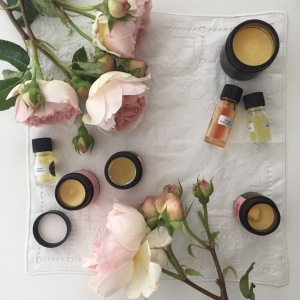
 These are the notes from one of the workshops I regularly run, with instruction on how to make your own completely natural face & body cream, with out chemical emulsifiers or preservatives. Please ask any questions as these notes are designed to go with a practical session, but they should be clear enough for you to re-create your own version of this yummy cream yourself…
Introduction – During the workshop we will go through the process together of making your own completely organic, natural face and body cream, without using any chemicals, emulsifiers or preservatives.
When the cream is ready, and you have your own pot to take away, you can choose to mix in essential oils or not, and if so, you can choose one or a few different essential oils to mix in, and a blend strength that suits its intended use (up to 1% for the face, and up to 5% for the body). See blend strength chart in my previous blog for more details.
If you decide to make your own cream after the workshop, then you can follow the recipe used, but you may like to vary the ingredients a little according to your skin type, or to get a specific effect.
Just be aware that you need to keep the ratios of different types of products the same -so keep the amount of water, oil, butter and wax products used the same. There is room for a little variation here, you just need to be aware that if you use more water products, the cream will have a thinner consistency, and if you use more solids then it will be thicker in consistency, so you can tailor this to your desire too.
The recipe we will use is for a simple cream involving no chemical emulsifier. Most cosmetic creams will use an emulsifier of some kind -usually emulsifying wax. This is because to make a cream, you need to mix oil and water together, two substances that don’t like to mix with each other. An emulsifier kind of thickens the two and makes them like each other. They are made from chemicals, and cannot be natural or organic. So this recipe is a little tricky, as it involves mixing the ingredients carefully so they don’t split. But, with patience and care, it is possible (it is in fact similar to how mayonnaise is made). You will need to use a fairly good blender, whereas with an emulsifying wax you can usually just whisk the ingredients. The recipe does include beeswax, and this has some naturally emulsifying properties which helps the process.
Ingredients:
- 200g Floral Waters/ Herbal Infusions – or blend of both.
- 70g Butters/ Wax – I like to use 35g of Shea Butter & 35g of Coconut Oil.
- 130g Base/Carier/Vegetable Oil – I use a blend of different oils including Olive, Apricot, Avocado, Macadamia, Rosehip (see my range of carrier oils for inspiration).
- 10g beeswax
Optional Extras
- Aloe vera gel or Aloe vera water –include this with the water ingredients (50ml aloe, 150 floral water).
- 5ml vitamin E
- Essential Oils: 0.1 – 2% blend strength for face creams and 1 – 5% blend strength for body (see blend strength chart in my blending blog for more details). For this recipe 1ml (20 drops) of essential oils would be approximately 0.25% blend strength which is usually enough.
About the ingredients:
Waters:
The water part of the cream is the problem area, when a product contains water it means it is prone to growing bacteria, as water contains oxygen, and bacteria thrive in this environment. Don’t use water from a tap, buy bottled spring water or try the following:
Floral waters
There are a few versions of floral water, you can often purchase the water that is produced during distillation of an essential oil, this is known as the by-product, but in the workshop we use a rose water that is distilled from organic roses in the Bulgarian rose valley, and the process is carried out for the sole purpose of making rose water (rather than a by product of making essential oil). This gives a much stronger scent and longer shelf life. The copper still makes a much better quality product than the more commonly used stainless steel stills. This Rose water is available to buy from my webshop. You can also use a handmade version, which is spring water mixed with an essential oil, left for a week or 2 and shaken intermittently, and then filtered. Floral waters are similar in action to essential oils but much gentler and can be applied directly to the skin, they really enhance the cream and because they have natural anti-bacterial properties, they help to protect the cream from going off.
Infusions
An infusion is just like making a cup of herbal tea (a proper cup of herbal tea that is not made from a dried up old bag of dust). You place your choice of herbs in a tea pot (or cup) and pour boiling water over the herbs (make sure the water is ‘spring water’ and not from the tap to avoid contaminating the cream). One heaped teaspoon (double the amount if using fresh material rather than dried) to 175ml of water is a standard therapeutic infusion. If using a cup, make sure you cover it to keep the volatile oils from escaping with the steam. Leave to steep for 10 minutes, and strain before use (any little bits of plant material will contaminate the cream so ensure it is fine strainer).
Oils:
Carrier Oils (base oils)
These are cold pressed from the fruit nut or seed of a plant, for example olive (fruit), almond (nut) or sunflower (seed). Make sure you use good quality organic oil that has not been refined, as the refinement process will have destroyed many of the nutritious qualities of the oil. However, you might choose to use a refined oil if the smell is not to your taste, they can be quite strong for example coconut or avocado.
These are some of my favourite base oils to use on the face:
- Avocado ~ rich, nourishing, hydrating.
- Rosehip ~ one of the best base oils for helping scars to heal.
- Apricot ~ gentle & suitable for all skin types.
- Macadamia ~ rich, nourishing –has a gorgeous nutty scent.
Macerated oils
An infused oil is carrier oil that has been ‘infused’ with the qualities of a herb or flower for example marigold/calendula or St. Johns wort. Generally the plant material is immersed into a carrier oil e.g. olive or almond oil, and either left in a warm dark cupboard over a period of weeks, or heated gently in a bain-marie for a couple of hours. The oil absorbs many of the plants properties and the leached plant material is strained out of the oil through muslin cloth after 2-3 weeks.
Butters
Again, these have been cold pressed from part of the plant, and include Cocoa, Coconut, Mango, and Shea. They are solid at room temperature, and bring a creamy effect to the product and have a nourishing effect on the skin, usually high in vitamins and fatty acids.
Beeswax
This is what helps the cream to emulsify, try to find a good quality and trustworthy source. It is also an emollient, very soothing and protecting for the skin. If you are vegan and want to avoid beeswax you could try coconut wax or candelilla wax.
Vitamin E – optional
This is a great natural preservative.
Essential oils – optional
Essential oils are normally steam distilled from various parts of plants such as flower, leaves, fruit, roots and bark. With citrus oils it is usually just pressed from the peel, and for some delicate plant material (usually flowers and blossoms) will use a solvent to gently extract the oil. They have a strong scent to them, so are a lovely way to personalise your blend, but also have very potent healing properties that affect the body on a physical level as well as the way we feel. Even though the cream is complete on its own, the essential oils will bring another dimension to the effect and can also help to support the shelf life as they are naturally anti-bacterial to varying degrees.
These are some of my favourite essential oils to use on the face:
- Rose ~ hydrating, nourishing and deeply nurturing.
- Lavender ~ cleansing, clearing, gentle, antimicrobial (see my blog post on Lavender for more details).
- Benzoin ~ protective.
- Chamomile (Roman chamomile)~ soothing, calming, delicate, anti-inflammatory, anti-allergy, (see my blog post on chamomile for more details).
- Myrrh ~ deeply healing, great for scars (avoid in pregnancy).
- Mandarin ~ gentle, toning, light.
- Geranium ~ balancing, feminine, supports hormones.
- Neroli (orange blossom) ~ calming, gentle, soothing.
See my webshop for more essential oils that you may like to use.
Equipment
- Scales
- Bain marie/ double boiler
- Measuring jug
- A decent blender
- Spatula
- Pots or containers for finished product -make sure they are cleaned and sterilised by rinsing with some boiling water, and completely dry.
Instructions
Prepare the ingredient first, measure and weigh the amounts so they are ready to add in at the appropriate moment.
Melt all the solid oil base products by gently heating them in a bain marie or double boiler. Then add the liquid oil products to this, you may need to heat it through a little more, as the cool liquids can cause the mixture to begin solidifying again.
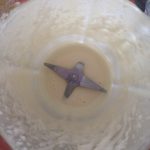
When they are completely melted pour this mixture into a blender and let it cool down for a few minutes. The melted mixture should become a little opaque in colour, but not to the point that it is beginning to solidify, see it has a buttery appearance.
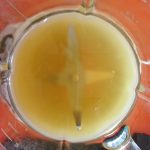
Put the blender on a low setting and add just a little of the water based products at a time. You will see it become milky in appearance:
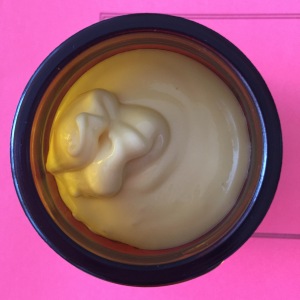
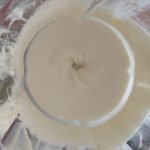
…and eventually thickens to a cream:
Take your time when adding the water and blending, as adding too much water initially will make it difficult to emulsify and it will be more likely to split. If the cream splatters up the sides of the blender, use the spatula to get all the mixture in the bottom each time you add more water, so the entire mixture is evenly blended.
If you decide to add Vitamin E and essential oils to the cream, do this at the very end as you do not want to expose them to heat. Pour the mixture into some little pots or jars. Ensure they are clean and dry –I usually pour some boiling water into them to sterilize them first and then dry them. Pour the cream as soon as it’s ready, as it will become thicker as it cools, and more difficult to get out.
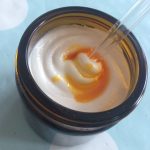
As in the workshop, you can add essential oils at this point too–if you have several containers and you want to create different blends for each one, then it’s ideal. I find it quite practical to use a chop stick to stir them through.
Shelf Life
Because this cream is very natural and does not contain chemicals or preservatives, it is likely to only last 2-3months. I would recommend keeping it in a cool dark cupboard or in the fridge if you can. It will usually only go off if it becomes contaminated somehow and this can often be due to bacteria in the water based ingredients. Make sure you don’t use any water from the tap if making an infusion, use spring water. Ensure all equipment being used is sterilised.
Using your cream
Having made the cream from scratch, and knowing all the wonderful ingredients that go into it, it can help me to be a little more focused on my skin care routine, to be more appreciative of this time with myself. It’s particularly lovely to massage gently around the jaw, and to take this time to let go of any tension held in this area. In doing this I become more aware of the tension held in other areas in the face –including cheeks and eyes! I also use the cream on my neck across the top of my chest, massaging just under the collar bones which delicately allows me to become more open around the chest area, I can feel the difference in my whole body especially my posture, when I do this. Basically, just enjoy and appreciate using it on any part of your body.
Here are some ingredient variations for inspiration when designing your own versions:
Rich, hydrating and nourishing, for dry and mature skin
- Rose floral water
- Avocado, macadamia
- Coconut, shea
- Rose, frankincense, myrrh
Gentle and soothing, for sensitive skin
- Neroli floral water, chamomile infusion
- Apricot, camellia oil
- Coconut
- Neroli, Chamomile, Mandarin
Eczema, delicate itchy and damaged skin
- Lavender floral water, chamomile infusion
- Evening Primrose, starflower/borage oil
- Coconut oil, shea butter
- Chamomile, lavender, benzoin
Light and balancing for young, oily, combination skin
- Geranium floral water
- Grape seed, apricot oil
- Coconut oil, shea butter
- Geranium, lemon
 Creams for Sale: I make versions of these natural face and body creams at regular intervals, so if you would like to buy one CLICK HERE to view the bespoke products on the webshop. Feel free to request specific ingredients, or preferred effects (eg. very hydrating or very gentle) as I am more than happy to design it to your requirements.

Roughly How much of the finished product is produced if i use your exact ingredient list?
LikeLike
It would make up around 400g or 400ml. There is always less than I’m expecting, and it’s very difficult to get all of the product out of the blender. I don’t like to waste it so I usually get my hand in and use all the edge bits to massage into exposed bits of my body. You can always double the quantities to make more…
LikeLike
Hi Laura! Thanks so much for this post. I’m going to be making my own face cream and It will be for my skin which is very dry and dehydrated and starting to get wrinkles… And acne prone. I’m only 24. I have decided I want to use aloe Vera juice for the water part or should I half it with something else? Also I want to use Shea butter only for the butters and of course beeswax. And for the oils I like jojoba oil Argan oil and rose hip oil which I heard are all very hydrating and non comodogenic. Lastly for EO maybe lavender and geranium. If you could please plwase help me out on how to ratio these or if you have any other ideas that would greatly help me! Thanks 🙂
LikeLiked by 1 person
Hi Averie,
Awesome to hear you are making your own face cream!
Using aloe vera juice is a great alternative to floral waters, you can use this for the full water part of the recipe, or you can use a combination, it’s up to you. I’d check the use by date on the aloe juice though, I’m not familiar with it myself (I’ve only used the gel in creams), so you don’t want something that will go off in a couple of days.
I have made some creams using just shea butter and beeswax as the solid ingredients (without coconut oil), and they have turned out just fine. I used a little too much shea butter initially and it had a paste like feel to it but with my last batch I used a little less shea and more aloe vera gel to make sure it still had a cream like effect. It might be just fine since you are using the aloe juice.
Jojoba is very suitable for you as it’s actually a liquid wax, it is said to be very similar to human sebum, so it will absorb into your skin very easily.
Rosehip is the best oil I know to use on scars, so if you are experiencing acne, it will help to heal and improve any scarring involved.
Argan is also a nice light oil for the skin. You mentioned your skin is very dry, so I would suggest using a base oil that is very rich & nourishing like avocado, or macadamia nut oil.
Geranium & Lavender are ideal essential oils for a face cream, Lavender will support your skin to heal and help with acne as it’s very antimicrobial. Geranium is balancing to the endocrine system and acne can often be affected by hormones so this should support you on this level.
Rose essential oil is particularly hydrating, so you could include this in your blend, but I do feel it will be enough with Geranium and Lavender.
I’d love to know how you get on.
With love, Laura
LikeLiked by 1 person
Did you use aloe gel straight from the leaf or a bottled/tube product? And would it work if I used a slab of gel cut out of a big leaf?
LikeLiked by 1 person
I initially used a shop bought aloe gel, but I found it impossible to find something completely pure, they are usually 99% aloe vera with some preservatives or other ingredients I would prefer not to use, but it is very simple and practical to use. I have since discovered a 100% organic aloe vera product that comes as a powder by ‘Biorigins’, and I now use this in my creams but it won’t do much for the consistency. You can use fresh flesh from the aloe plant if you have one, be careful when you scoop it out that you don’t get anything contaminated along the way… this is probably the purest way to use it.
LikeLike
Hi.
I’m interested in producing anti- ageing cream with a natural fruit as it’s main ingredient but I need as much information for the purpose.
Please advise the possible route for achieving my objective.
Thanks.
LikeLike
Hi Sohail, thank you for the question, I would suggest that you use some oils that come from fruit seeds in the cream, such as raspberry or blackberry seed, they are super nourishing, full of anti-oxidants and feel amazing. Some other oils you might like the feel of could be sea buckthorn (gives skin a glow), apricot kernel (very gentle), rose hip (amazing for scarring) & pomegranate seed oil (literally plumps the skin). Even avocado is technically a fruit and a particularly rich oil so great for mature skin. Using actual fruit in the cream would not be advisable as it would go off very quickly – as soon as the fruit naturally does – you could use fruit in a face mask but really the oils are much more nourishing for the skin.
Check out the full range of carrier oils with more details on their qualities here: https://shop.essentialoilsandyou.co.uk/collections/carrier-oils
LikeLike
Hi Laura. This recipe has really appealed to me since it is lighter and less greasy than some I have tried. I have two main problems though.
The first is that, having tried to make it twice now, on both occasions it splt, even though I poured the water elements in really slowly. I used an electric whisk since I don’t have a blender; do you think this might be the problem?
Secondly, and this is a problem I have found with all my hand, face and body creams, is that when I add my essential oils at the end, I can hardly smell them! I made a batch of face cream (different recipe from yours) using Elemi which I adore the smell of and it has great toning and firming properties. But using the reduced percentage since it was a face cream, I couldn’t detect it at all! Do you have any suggestions on this?
I have now ordered a proper food blender now because I am determined to get your recipe to work, so I will let you know how I get on!
LikeLiked by 1 person
Hi Niki, I’m sure the reason it would split is the electric whisk, I haven’t tried a whisk but do not expect it to be powerful enough to get the ingredients to fully emulsify. Great that you have treated yourself to a blender, let me know how you go with that…
What percentage blend have you used? – I always go for a very low percentage because I have super sensitive skin and an acute sense of smell – you really should be able to pick up the smell of elemi at 0.5% or 1% – do you want to let me know the quantity you are blending and how many drops you’re using so I can check the amount is correct? Note, that if the rest of the ingredients you are using are unrefined then they can have a scent that might not support the scent of the essential oil? Also, the oils I use are extremely high quality, so the scent may be stronger at a lower dosage. There are so many variants – I’m sure you’ll have more success with the help of the blender, but do let me know if you need more support. With love, Laura
LikeLike
Hi Laura
Thank you so much for responding to my questions. Your advice regarding the blender method of mixing might be the answer to my prayers: it arrives tomorrow so the first thing I shall be doing with it will be attempt number 3 of your cream.
I put 1ml of Elemi into the recipe which I think falls within your guidelines, but I think I am right in saying I could go up to 2ml for the face? I don’t have sensitive skin so this shouldn’t be an issue.
I am very interested in what you have to say about unrefined ingredients. I use coconut oil which is unrefined and organic, because I was under the impression that the less refined a product is, the better. However, I find that anything I make with this leaves an overpowering smell of coconut which I simply cannot mask, and personally I don’t like coconut anyway. I use it purely for its great properties, not its smell. Can you suggest an alternative? My essential oil supplier does a fractionated version – is this what you would use?
Regarding my oils, I get them from a UK based, ATC registered company. I have always been wary of EOs whose provenance cannot be assured and only buy 100% pure organic oils. I have therefore assumed that they will be of the best quality. Is there still a variation in the quality of oils available under these credentials?
Sorry there are so many questions!
Very best wishes
Niki
LikeLiked by 1 person
Hi Niki,
I prefer cold pressed unrefined oils as they retain more quality and nourishment even in skin care.
With regards to coconut oil, I know what you mean about the strong scent – you could try a ‘deodorised’ version – this means the oil will have been heated to a high temperature to remove the smell. I would not recommend fractionated coconut oil as the purpose of this refinement is to make the oil liquid, and you need some solid oils in the cream to give it the creamy consistency.
With regards to adding essential oils to the cream, what quantity are you adding the 1ml to? My recipe makes around 400g, so if you’re adding it to that it would only be a 0.25%. If you’re only making 100g of cream then 1ml should be fine – hope that makes sense.
By the way, the essential oils I stock are from organic therapeutic and food grade sources, if you would like to try any of them out please feel free to use the voucher code CHERISH at the check out for £5 off your first order… I also source more unusual essential oils that may not be listed on the site.
https://shop.essentialoilsandyou.co.uk/collections/essential-oils
LikeLike
Success! I have finally made this lovely non-greasy hand and body cream! Thank you Laura for your suggestions and tips on how to get it just right and what type of coconut oil to use – I have learned so much from you.
I found that the new blender made small work of emulsifying the water and oil ingredients. The deodorised coconut oil was perfect since it didn’t leave any overpowering smell.I used lavender and rose floral waters (150mls) with 50mls aloe vera gel. The liquid oils were avocado, rosehip, apricot and a little pomegranate oil which resulted in a more yellow finished product and it looks great.
EOs were lavender, rose geranium, and rose otto. I used 4ml (so 1% ratio) and because of the deodorised coconut oil, the cream smells beautifully delicate.
Thank you once again Laura for sharing your amazing knowledge with us all!
Niki
LikeLiked by 1 person
Amazing Niki, thanks for sharing. I hope you’re appreciating that taking a little longer to make your cream has allowed you a finer understanding of the details of the way the ingredients come together!
LikeLike
Hi Laura, I’ve been keeping up with your articles for a while and I absolutely loved this one as well as the trouble shooting tips.
Is this recipe pumpable? I have some gorgeous lotion pump bottles but the lotion recipes I have tried so far have been too thick (they did contain a higher ratio of beeswax than yours) and I wanted to to try something that I could put in a sterilised lotion pump bottle.
Thank you
LikeLiked by 1 person
Thank you for your feedback. I have tried this recipe in a pump and it worked but be aware that the cream can vary in consistency, depending on the temperature of the space. If you have trouble, try keeping it in a warmer place. However, if I’m not using my cream (if I have 2 pots?!) I keep it in the fridge because it has such a short shelf life, but if you’re putting it in an ‘air-less’ pump, this will help prevent contamination and so also helpful for shelf life. Look out for a new cream recipe coming soon with an olive derived emulsifying wax, which increases the shelf life and allows for a higher water content, which may work better in a pump.
LikeLiked by 1 person
Thank you, that’s really helpful! I was going to make one for my mum, her house is generally nice and cosy so I’ll see how it goes.
LikeLiked by 1 person
Another question, can this be made with an immersion blender? Or would it have to be a smaller amount? Or would it just not work?
LikeLiked by 1 person
It should work with an immersion blender. A smaller amount is actually more difficult to work with as you will need to ensure the container you’re blending in containers the mixture enough so that the blender is immersed enough to mix everything, and ensure you still add the water part little by little…
LikeLike
Thank you Laura, the creams turned out beautifully. My only gripe was the lavender floral water I used (from another supplier) made them smell hideous. The addition of a few eos fixed it but I’m going to make another batch using the chamomile floral water I purchased from yourself (which smells so gorgeous btw that I haven’t gotten over just inhaling it yet lol)
LikeLiked by 1 person
So glad to hear the creams turned out well and you managed to cover the lavender water smell – I guess it’s a great example of how all the ingredients used play a part in the final product and it’s important to pay attention to quality. I find that if the lavender water is a ‘bi-product’ of essential oil production it generally doesn’t smell great, but when produced as a stand alone product, where the distillation is more carefully carried out, it smells more like lavender. I’m sure the chamomile water will go well, and it is super soothing to the skin too!
LikeLike
Hi Laura
Absolutely loving this post and the thread is really helpful.
I am planning to make my own skin cream because I haven’t found anything that helps my rosacea. It’s pretty bad! My skin is very sensitive and I’m 52 so fall into that ‘mature’ bracket.
My question is which ingredients would you suggest for my type of skin? I just want to make sure before I spend lots of money 🙂
LikeLiked by 1 person
Wow I’m revisiting this blog post after almost 2 years to refresh my memory as I’m planning on making another cream, putting it together was so therapeutic last time and thank you so much Laura for all of your help and troubleshooting tips, I’ve learnt so much from experts like yourself
LikeLike
So glad it’s still useful for you, enjoy your cream!
LikeLike